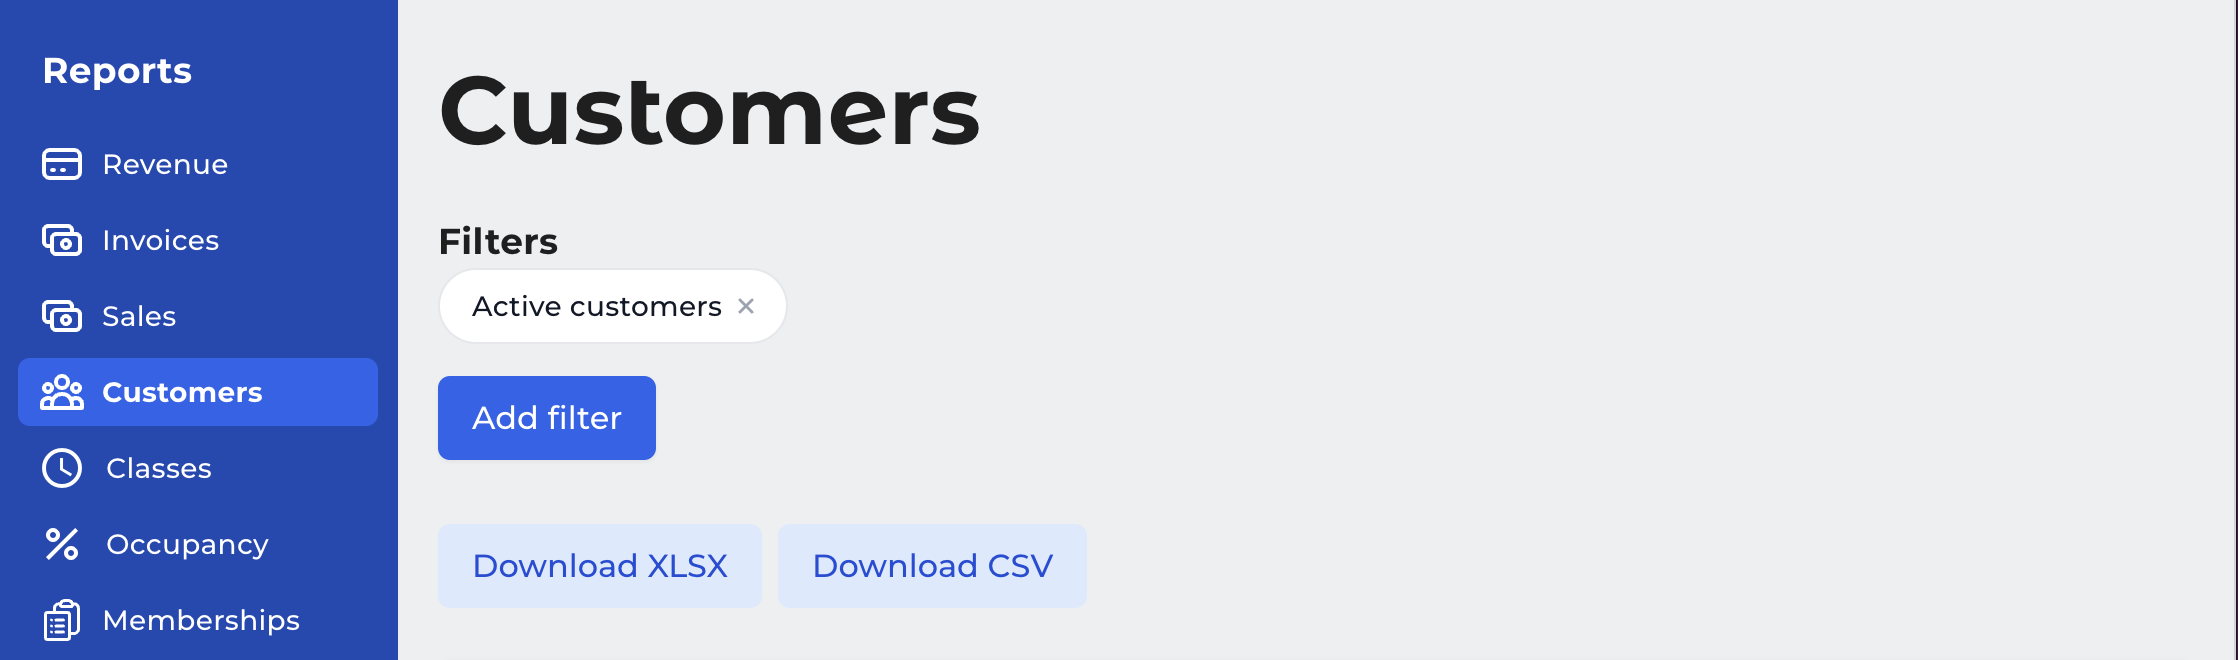
- In YOGO admin, go to 'Reports' --> 'Customers'
- Select the customer group to be exported. Then click 'Download as CSV' and save it to an easily accessible place on your computer.
- Log in to your Mailchimp account. In the left menu, click on 'Audience'.
Then click on 'Manage Audience' --> 'Import contacts'.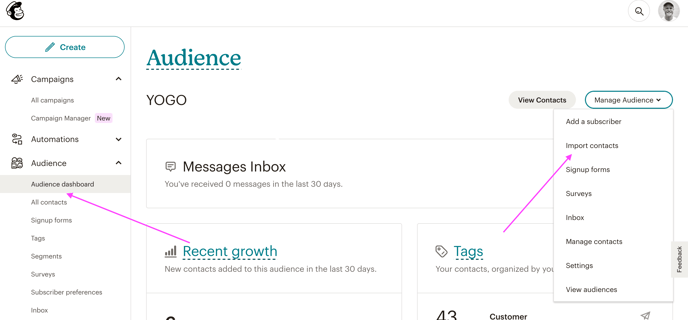
- Select 'Upload a file' and click 'Continue'.
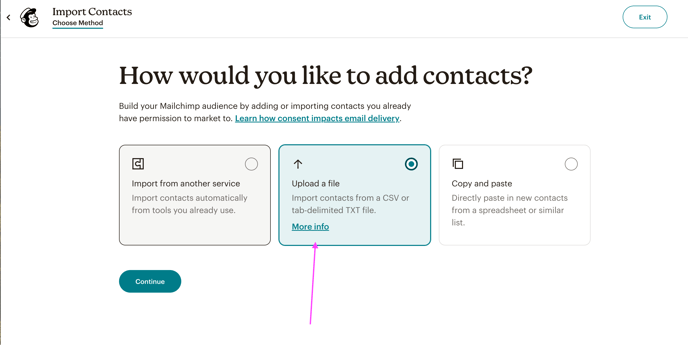
- Click on 'Browse' and select the CSV file that was just downloaded from YOGO.
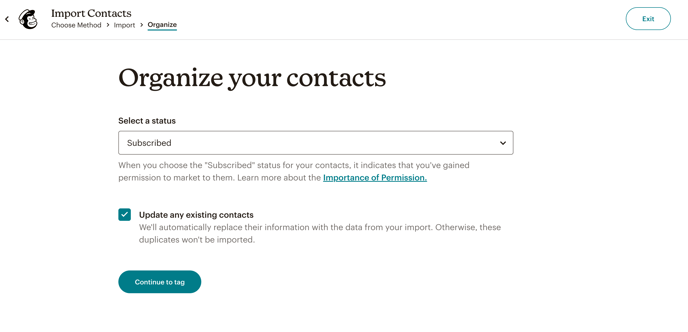
- Select 'Subscribed' under status, check the box 'Update any existing contacts', and click on 'Continue to Tag'.
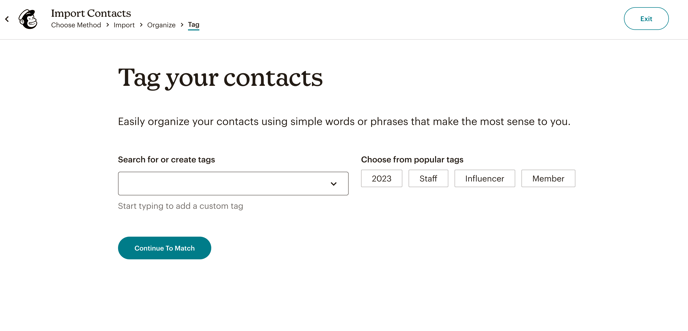
- Give your import the relevant tags, for example, 'Active customers'.
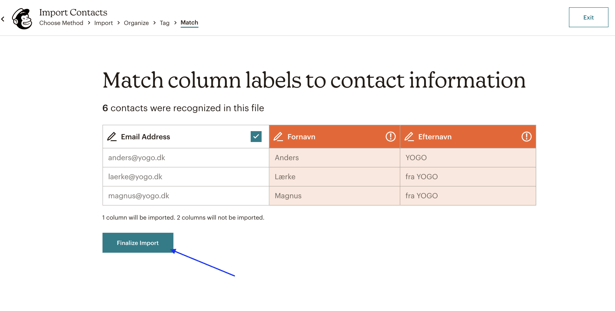
- Ensure that emails and names match, then click on 'Finalize Import'.
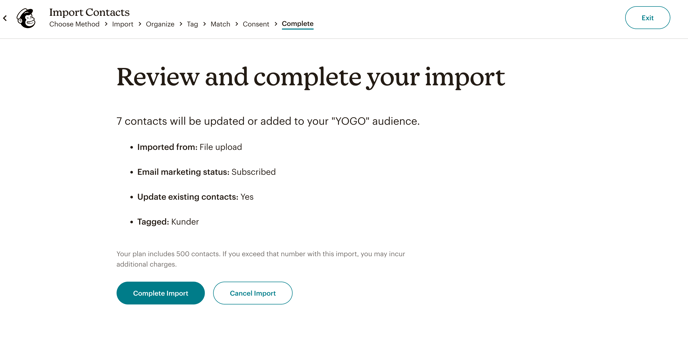
- Check that everything is as it should be and click on 'Complete Import'.
- Your contacts are now imported and you are ready to send newsletters from MailChimp 🥳.
English